Replace timing chain Nissan Primera P12 Engine QR20DE

top-dead-center-timing-mark

I have been working on a blown head gasket replacement for this engine. (Mysteriously the head & block were not warped – so I replaced thermostat & water pump hoping that an overheat caused it to blow)

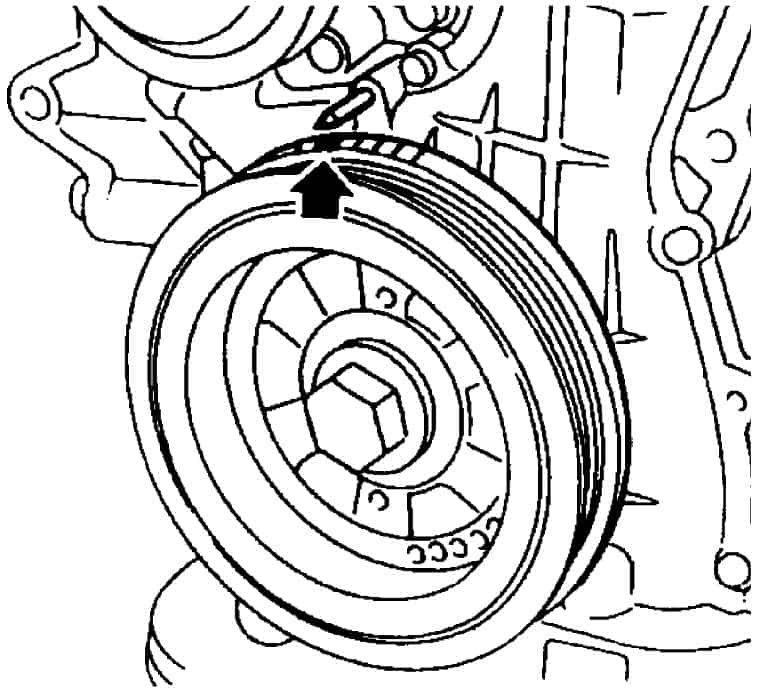
I have gotten to the rebuild & put the cams back in. When I went to turn the engine over to check for interference with the pistons & valves it does get stuck at one point. The last idiot tried to do some work on the engine & had removed the crank pulley. It seems to have all gone back together with the timing marks on the cam gears matching the chain marks.

I have no idea how to move on. Any thoughts?


You stated that something is getting stuck. This sounds like something is hitting internally. Taking it back apart would be the next step.I am thinking you may need to check for a bent valve or just re-check timing.

Make sure to follow the rule of turning the engine over several times to check your timing is good before assembling the rest of the engine.

Timing Chain, Replace

Caution: With timing chain removed, avoid turning camshaft or crankshaft. If movement is required, exercise extreme caution to avoid valve damage caused by piston contact.
Caution: It will be required to recover A/C refrigerant charge. Refrigerant recycling and service equipment for R-134a refrigerant will be required.
1.Release fuel pressure as follows:
a.Remove fuel pump fuse/relay and start engine.
b.After engine stalls, crank engine two or three times to release fuel pressure.
c.Turn ignition switch Off and connect fuel pump relay.
2.Disconnect and isolate battery ground cable.
3.Drain engine oil into a suitable container.
4.Raise and support vehicle with jack stands.
5.Remove engine under cover.
6.Remove front righthand wheel and engine side cover.
7.Remove accessory drive belts, then water pump pulley.
8.Disconnect hoses, wiring harness and electrical connectors to gain access to timing chain, as required.
9.Remove valve cover bolts in sequence, Fig. 1, then rocket cover.
10.Remove cylinder head outside bolts.
11.Set No. 1 piston at TDC of its compression stroke, Fig. 2.
12.Rotate crankshaft until mating mark on camshaft sprocket is set at position, Fig. 3.
13.Remove aluminum oil pan as follows:
a.Remove front exhaust tube.
b.Position a suitable transmission jack under transaxle and lift engine with engine slinger.
c.Remove center member.
d.On models with automatic transmission, remove shift control cable.
e.On all models, remove A/C compressor gussets.
f.Remove rear cover plate.
g.Remove oil pan bolts in sequence, Fig. 4.
h.Remove oil pan baffle.
i.Remove two engine to transmission bolts and install one of them into open bolt hole, Fig. 5. Tighten installed bolt to separate aluminum oil pan from cylinder block.
j.Remove aluminum oil pan.
14.Remove steel oil pan as follows:
a.Remove oil pan bolts in sequence, Fig. 6.
b.Remove oil pan.
15.Remove oil strainer.
16.Temporarily install center member to support engine.
17.Remove crankshaft pulley.
18.Remove alternator.
19.Recover A/C refrigerant into an approved container using suitable A/C charging/recovery equipment. Caution: Avoid breathing refrigerant and lubricant vapor or mist, as exposure may cause eye, nose and throat irritation.
20.Remove A/C compressor with hoses attached and position aside.
21.Remove A/C bracket.
22.Remove alternator bracket.
23.Position a suitable transmission jack under main bearing beam.
24.Remove righthand engine mounting.
25.Remove oil pump drive spacer. Be careful not to damage oil pump drive spacer and front oil seal.
26.Remove front cover. Be careful not to damage cylinder gasket. Inspect for oil leakage at front oil seal. Replace seal if oil leak is present.
27.Remove chain tensioner.
28.Remove timing chain guides.
29.Remove camshaft sprockets.
30.Remove timing chain and crankshaft sprocket.
31.Install crankshaft sprocket on crankshaft. Ensure that mating marks on crankshaft sprocket face front of engine, Fig. 7.
32.Position crankshaft so that No. 1 piston is set at TDC and key way is at 12 o’clock. Fit timing chain on crankshaft sprocket, aligning mating marks, Figs. 8 and 9.
33.Install timing chain and timing chain guides.
34.Install camshaft sprockets and timing chain, lining up mating marks, Fig. 3.
35.Lock camshafts using a suitable wrench, then torque camshaft sprocket bolts to 101-116 ft. lbs.
36.Install chain tensioner. Ensure camshaft sprockets are tightened completely. Press cam stopper down, then press in sleeve until hook can be engaged on pin. When tensioner is bolted in position, hook will release automatically. Ensure arrow points toward front of engine, Fig. 10.
37.With a scraper to remove old liquid gasket from mating surface of front cover. Also remove old liquid gasket from mating surface of cylinder block.
38.Apply a continuous bead of liquid gasket to front cover, Fig. 11. Also apply suitable liquid gasket to matching surface to cylinder head gasket. Be sure to install new front oil seal in right direction.
39.Install oil pump drive spacer.
40.Install front cover on engine. Wipe off excessive liquid gasket.
41.Install cylinder head outside bolts.
42.Install righthand engine mounting and bracket.
43.Install alternator bracket and alternator.
44.Install A/C compressor bracket and compressor.
45.Install crankshaft pulley.
46.Set No. 1 piston at TDC of its compression stroke, Fig. 2.
47.Install oil strainer.
48.Install aluminum oil pan oil pan as follows:
a.With a scraper to remove old liquid gasket from mating surfaces. Also remove old liquid gasket from mating surfaces of cylinder block and front cover.
b.Apply a continuous bead of suitable liquid gasket to mating surface of aluminum oil pan, Fig. 12. Apply to groove on mating surface. Allow .28 inch clearance around bolt holes. Install oil pan within five minutes after applying liquid gasket.
c.Tighten oil pan attaching bolts in sequence, Fig. 13. Torque bolts 1-16 to 12-14 ft. lbs.; bolts 17 and 18 to 56-66 inch lbs.
d.Install two engine to transaxle bolts.
e.Install rear cover plate.
f.Install A/C compressor gussets.
g.On models with automatic transmission, install shift control cable.
h.On all models, install center member.
i.Install front exhaust tube.
j.Install baffle plate.
49.Install steel oil pan as follows:
a.With a scraper to remove old liquid gasket from mating surface of steel oil pan.
b.Apply a continuous bead of liquid gasket to mating surface of steel oil pan. Install oil pan within five minutes after applying liquid gasket.
c.Install oil pan. Torque bolt to 57-65 inch lbs., using sequence, Fig. 14.
50.Remove old liquid gasket from mating surfaces of valve cover and cylinder head.
51.Apply a continuous bead of suitable liquid gasket to valve cover gasket and cylinder head.
52.Install valve cover and oil separator. Be sure to install washers between bolts and valve cover. Tighten valve cover bolts in two steps, using sequence, Fig. 15. First step, torque bolts 1, 10, 11, 13 and 8 to 69-87 inch lbs.; second step, torque bolts 1-13 to 69-87 inch lbs.
53.Install spark plugs.
54.Install water pump pulley.
55.Install accessory drive belts.
56.Install righthand front wheel and tire assembly.
57.Install engine under cover.
58.Lower vehicle, then tighten lug nuts.
59.Connect hoses, wiring harness and electrical connectors.
60.Install accessory drive belt.
61.Fill cooling system to proper level with recommended coolant.
62.Fill engine crankcase to proper level with recommended engine oil.
63.Connect battery ground cable.

Select your Vehicle Repair Manual to get the full Instructions including images, wiring diagrams and more.