My a c condenser/trans cooler has hole in it all fluid and jazzed leaked out if a go ahead and replace it. Can i charge the system myself or do i need to take it to a mechanic?
Anytime you open the AC system it is advised to have a vacuum put on it before charging it. If you do not have the equipment to do that, you will need to take it to someone that does. Of course you can purchase the tools you need to do it yourself. The kit has come way down on price too. See below.
https://www.freeautomechanic.com/air-conditioning-troubleshooting.html
AIR CONDITIONING CONDENSER R&R
Review warnings and cautions for this system before performing procedure. Failure to follow these instructions may result in serious injury or death.
Caution: On late model year gasoline engine equipped vehicles with automatic transaxle, A/C condenser/receiver/drier assembly must be replaced if an internal failure of the A/C compressor has occurred. Failure to replace A/C condenser/receiver/drier assembly can cause serious damage to the replacement A/C compressor.
Caution: Before removing A/C condenser, note the location of each of the radiator/condenser air seals. These air seals are used to direct air through A/C condenser and radiator. The air seals must be reinstalled in their proper locations in order for the A/C and engine cooling systems to perform as designed.
- Disconnect and isolate battery ground cable.
- Recover refrigerant from refrigerant system.
- Remove upper radiator support and position it out of way.
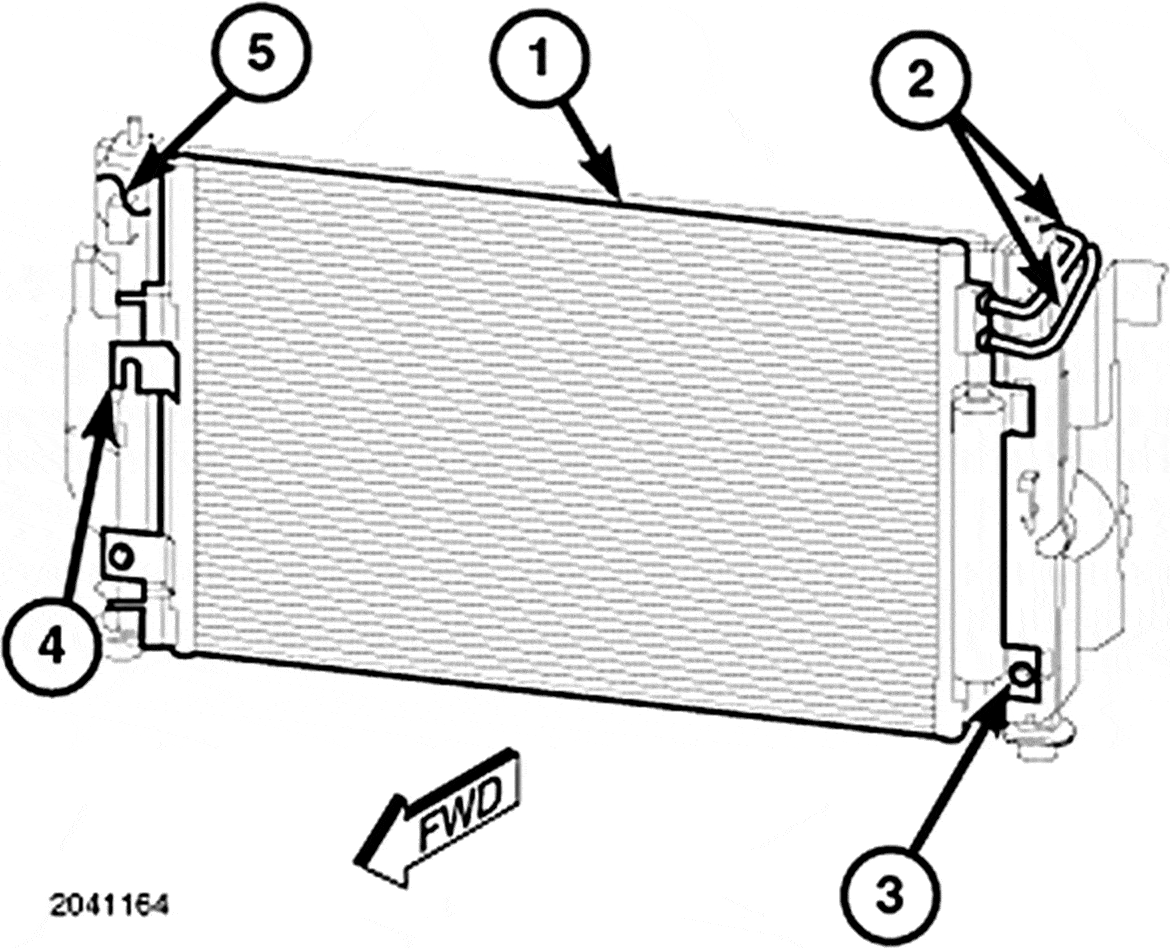
- Carefully push radiator (1) slightly rearward to gain access to the A/C condenser (2), Fig. 1.
- Remove nut (3) that secures A/C discharge line (4) to right side of A/C condenser and remove and discard O-ring seal and gasket, Fig. 1.
- Install plugs in, or tape over the opened discharge line fitting and condenser inlet port.
- Raise and support vehicle.
- Reach up through opening in bottom of front fascia located in right front corner of vehicle and remove nut (1) that secures A/C liquid line (2) to right side of A/C condenser (3), Fig. 2.
- Disconnect A/C liquid line from A/C condenser and remove and discard O-ring seal and gasket.
- Install plugs in, or tape over opened liquid line fitting and condenser outlet port.
- Remove two bolts (3) that secure lower condenser brackets to radiator (5), Fig. 3.
- Lower vehicle.
- For models equipped with automatic transmission, disconnect automatic transmission cooler lines (2) from left side of A/C condenser (1), Fig. 3.
- For all models, carefully lift A/C condenser straight up and disengage two upper condenser brackets (4) from radiator and remove condenser from engine compartment.
- Install in reverse order of removal.