Brake Calipers
- Disc Brakes
- Brake Rotors
- Brake Caliper
- Vacuum Booster
- Drum Brakes
- Wheel Cylinders
- ABS
- Master Cylinder
Brake caliper removal procedure:
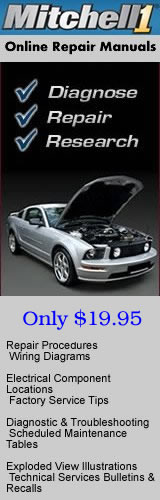
Getting ready to remove the front brake caliper
Step 1. You will need to jack up the car and remove the front wheels to gain access to the front brake components.
Step 2. Turn wheel to expose caliper mounting bolts.
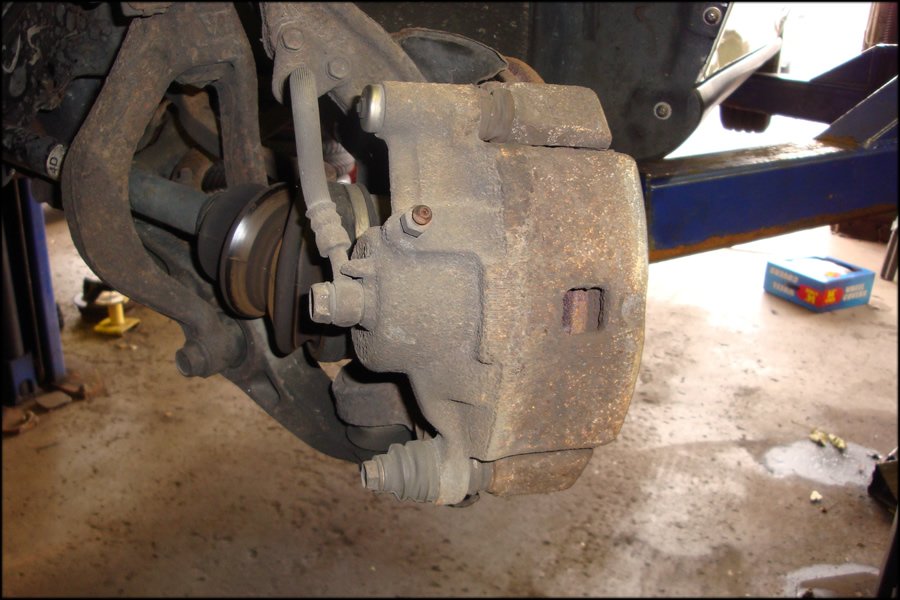
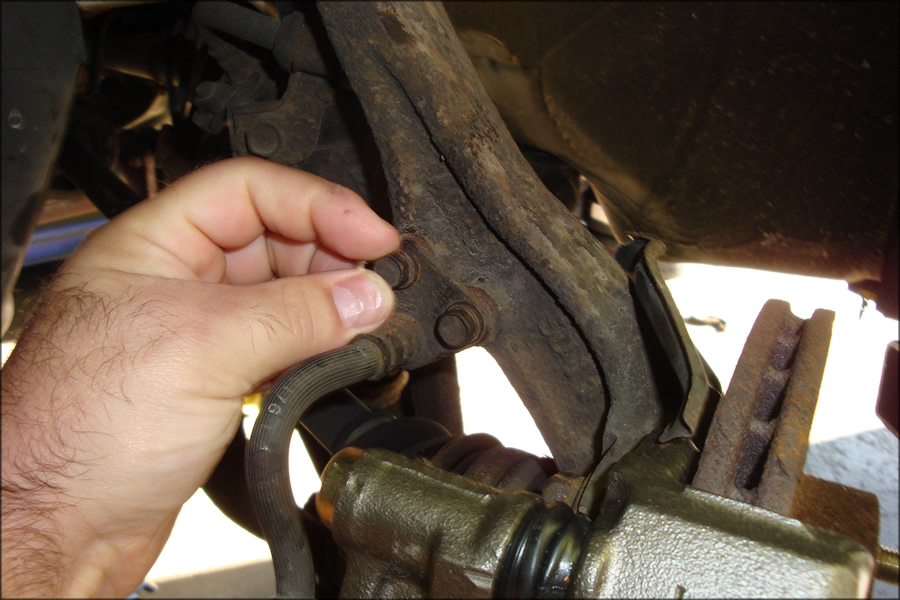
Step 3. Remove the two retaining bolts that hold the caliper hose in place. This will allow free motion. Not all cars have bolts, some are equipped with clips, etc.
Remove the brake caliper hose
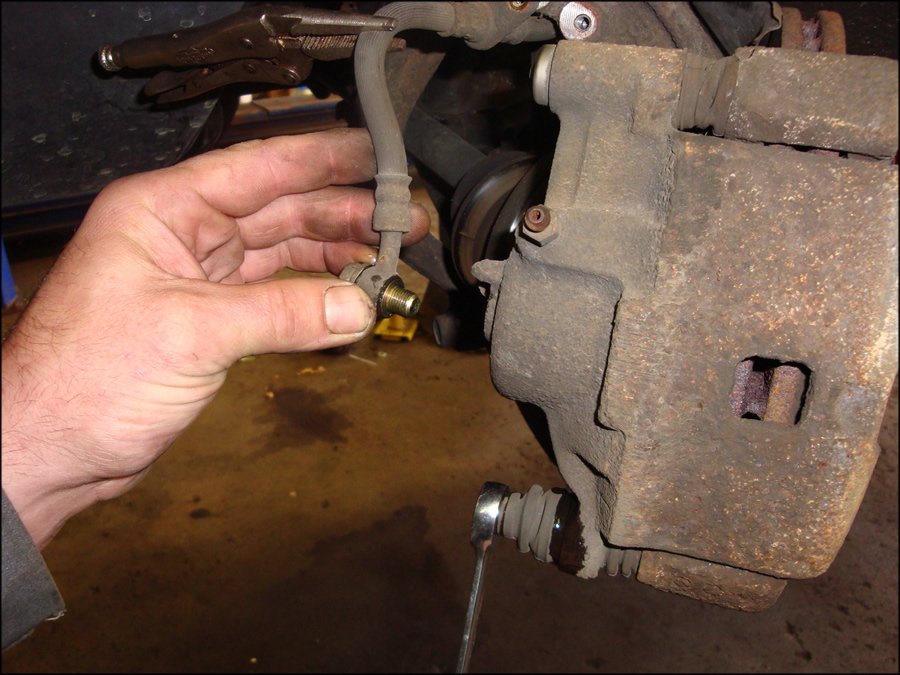
Step 4. Install a clamp on the caliper hose. Needle nose Vise Grips work well for this. This is done to keep from loosing all the brake fluid in the master cylinder. Do not clamp to tight damage to the hose may occur.
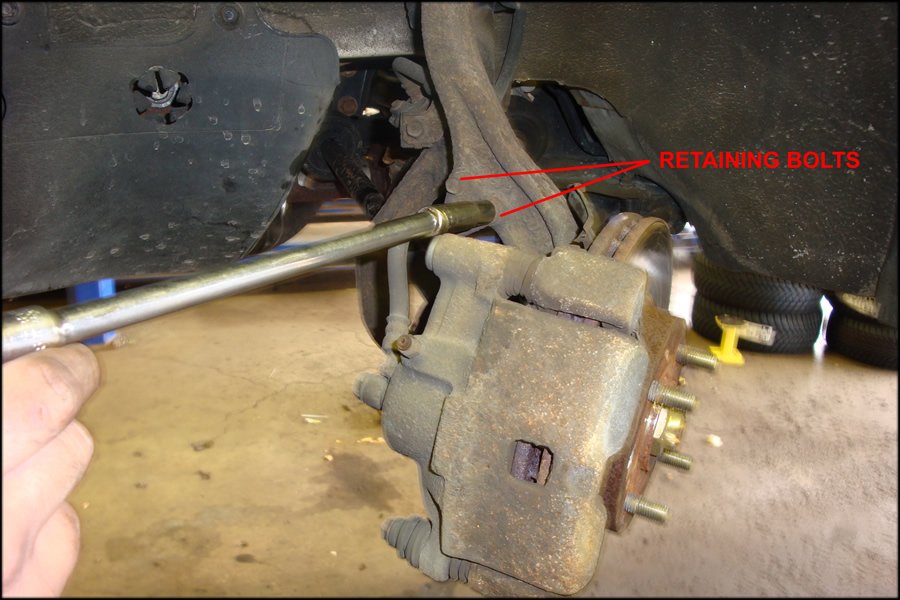
Step 5. Loosen the caliper hose "banjo" fitting.
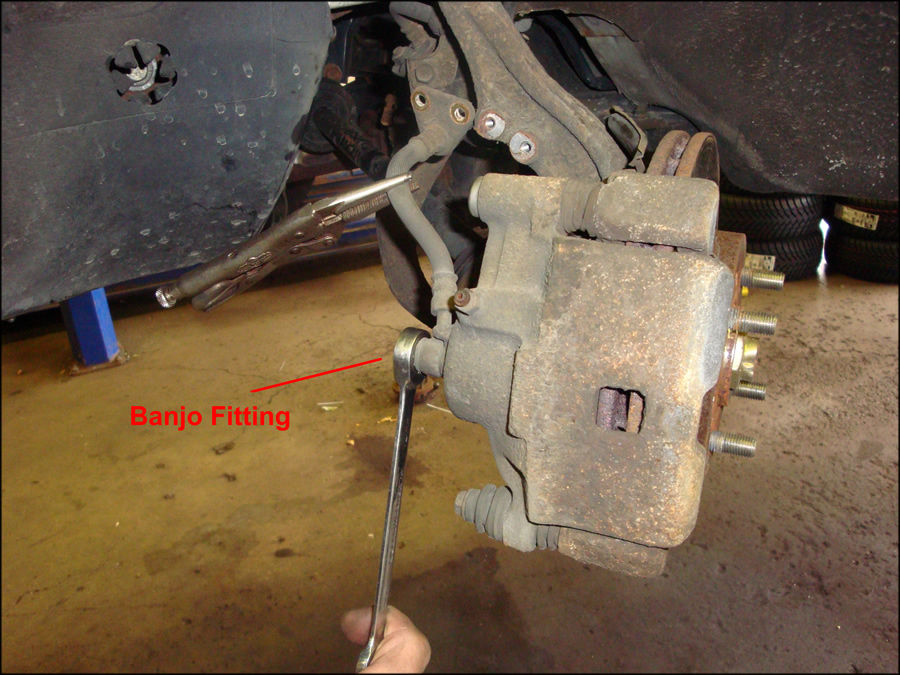
Step 6. Remove the Banjo Fitting.
Remove the brake caliper
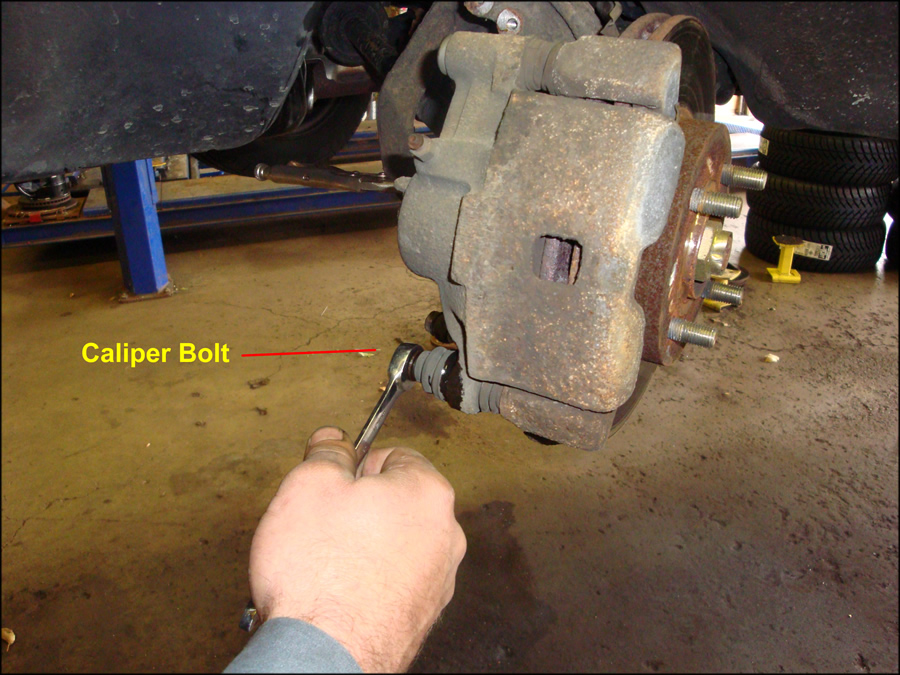
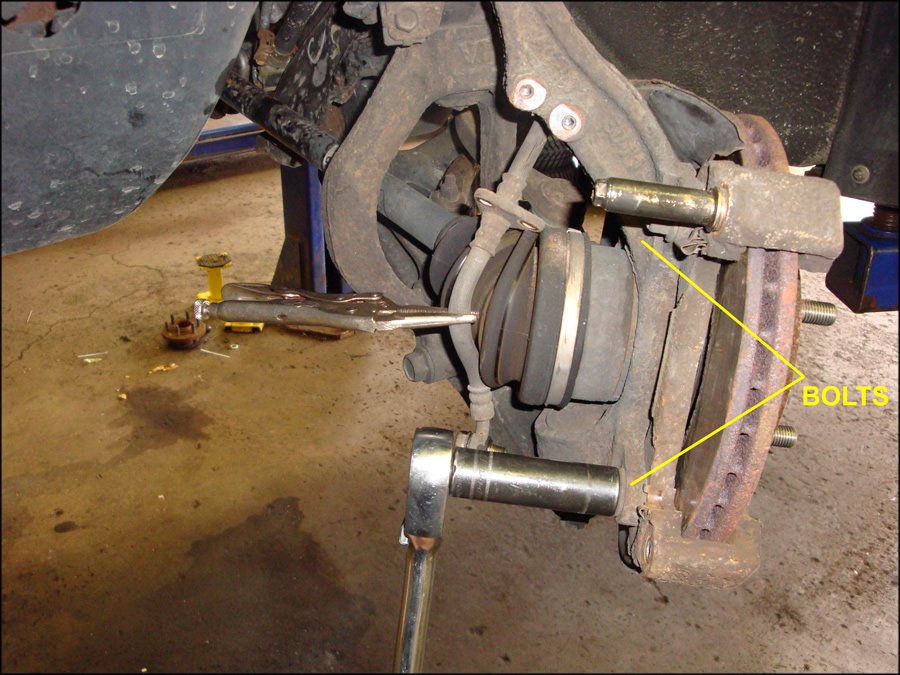
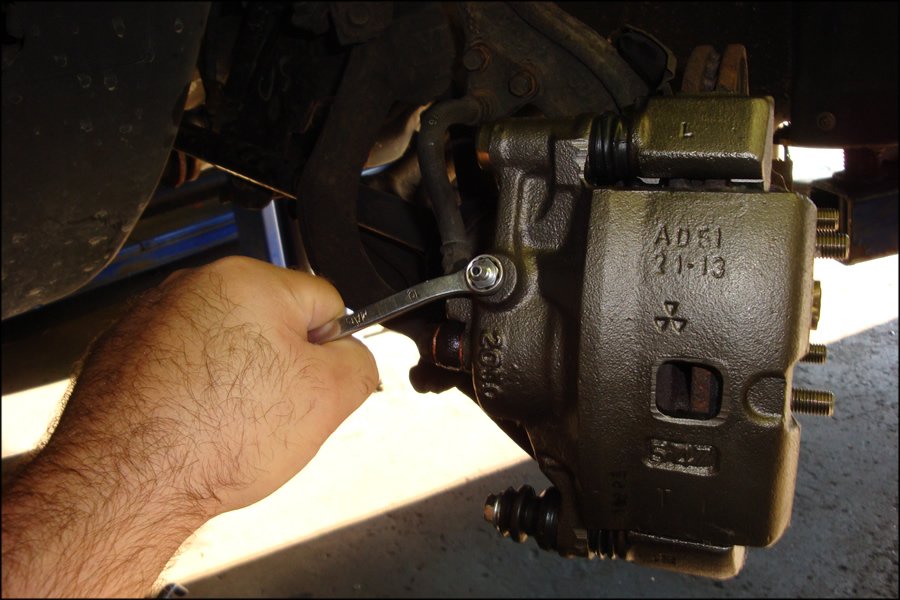
Step 7. Remove the Caliper bolt. Some cars have an upper and lower bolt that need to be removed. This vehicle just has one lower bolt.
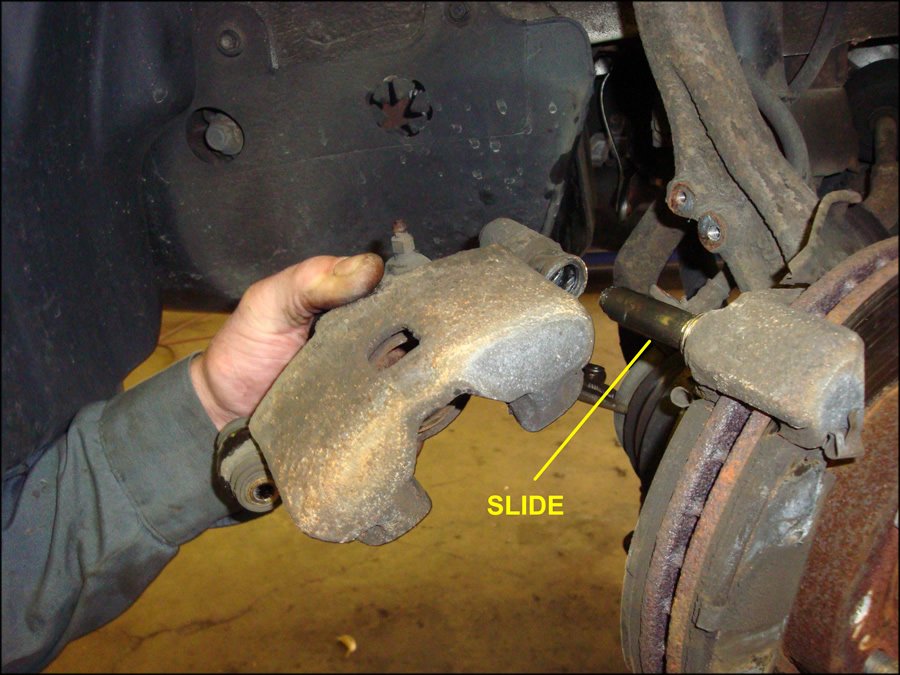
Step 8. Lift up from bottom till brake caliper clears the rotor. Then pull the caliper off the SLIDE mount.
Step 9. Remove the brake pads.

Remove the Mounting Bracket
Step 10. We chose to go with loaded calipers so we needed to remove caliper mounting bracket as well. Remove two mounting bolts.
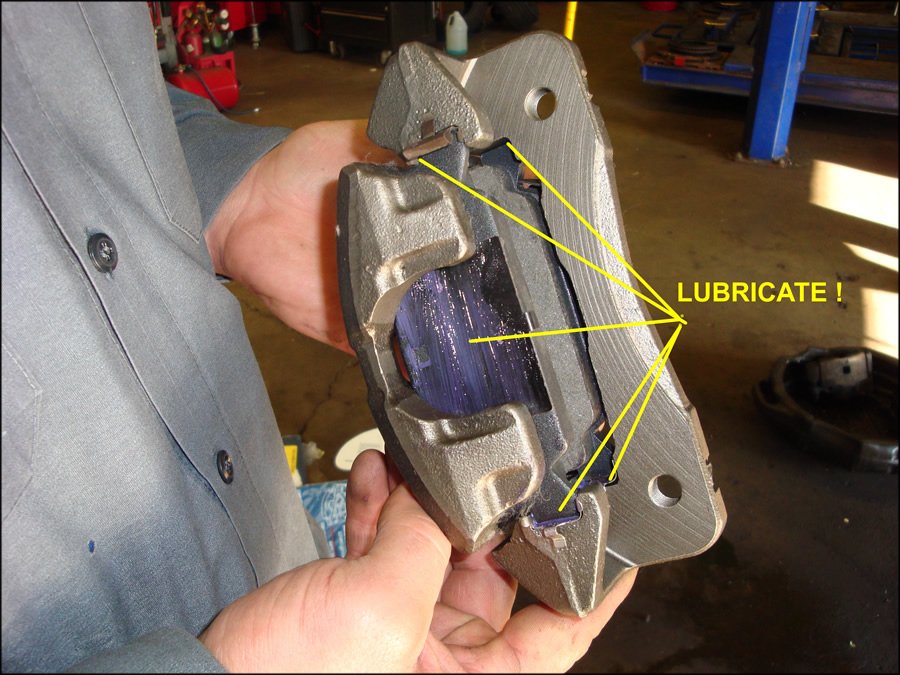
Step 11. Lubricate the back of the pads and the ends so they can slide freely. This is an important step to insure that your brakes will not make noise.
Brake caliper installation
Step 12. Slide brake caliper and pads over rotor and install the two mounting bolts you removed in step 10.

Install brake caliper hose
Step 13. Install Caliper hose with Banjo Fitting making certain to replace the 2 brass washers with the new ones provided.

Step 14. Install Hose Retaining bolts of clamp that you removed in step 3. Remove Clamp/Vise Grips that was installed in step 4.
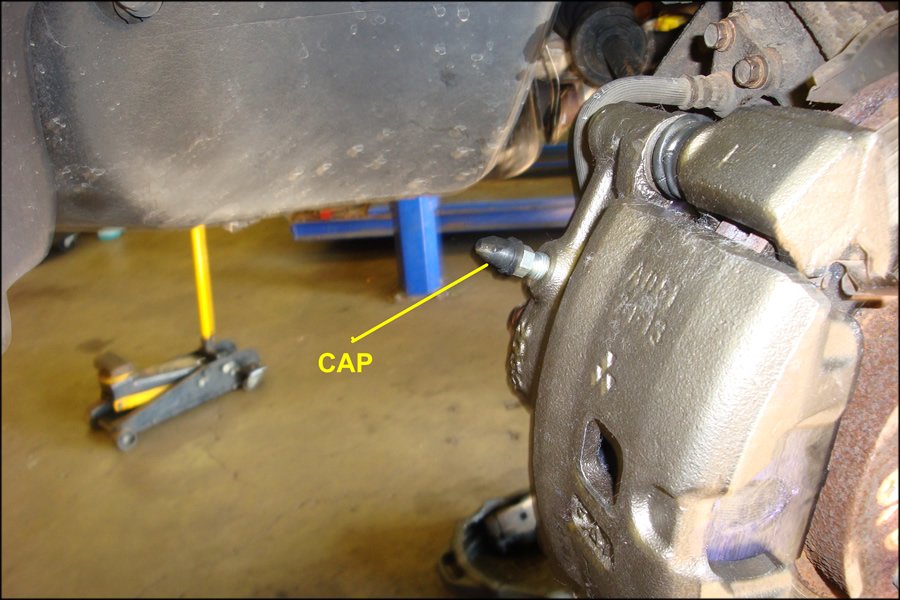
Step 15. Loosen bleeder screw and wait for fluid to drain. This is known as gravity bleeding. This some times can take a while. Removing the brake fluid reservoir cap sometimes speeds things along.
Step 16. Once you see a steady stream of fluid tap a few times on the side of the caliper and then tighten the bleeder screw.
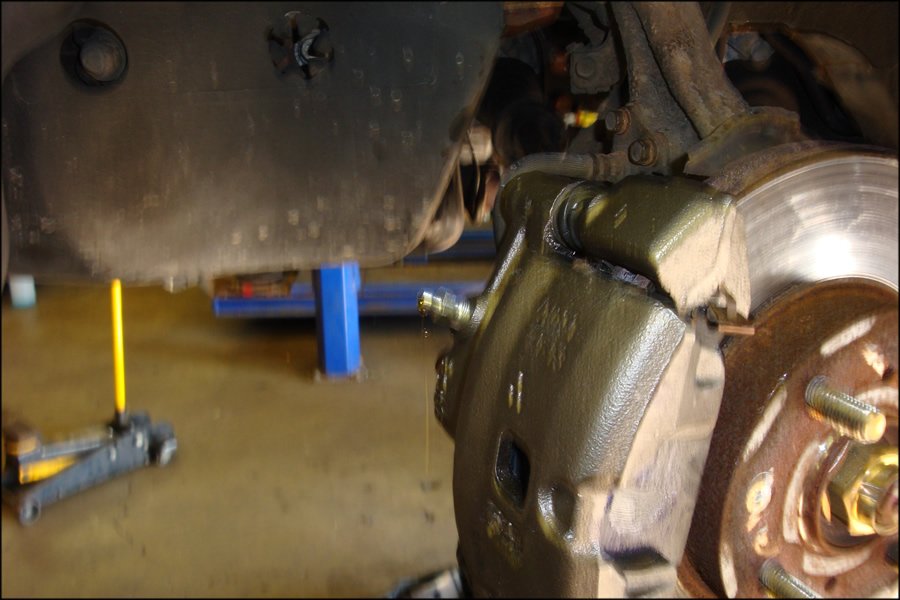
Step 17. Install the rubber bleeder cap to prevent dirt from entering.
Now your ready to bolt the wheels back on and pump the brake pedal to raise the pedal height back to normal. Remember these are new parts and easing on the brake the first couple of times is a good idea. Test drive the car and listen anything out of the ordinary. A short break in period is nice but not required when it comes to testing the brake caliper or brake calipers.
For Vehicle Specific Car Brake Auto Repair Manuals, Troubleshooting charts and Technical Service Bulletins. You can gain full on-line access to the same software that the dealers use for just $19.95 that cover repair of your entire vehicle. You can see step by step procedures on replacing brakes, bleeding procedures and more. Check it out.