
Front Strut Removal and Installation
Get Vehicle Specific Strut or Shock Repair Procedures, Troubleshooting charts and Technical Service Bulletins. You can gain full on-line access to the same software that the dealers use for just $19.95 that cover repair of your entire vehicle. You can see step by step procedures on replacing struts or shocks, diagrams and more. Check it out.
In this section you will find complete step by step instructions for proper front strut replacement and strut installation. If you follow these steps you are assured to make the front shock/strut removal and replacement as easy as possible.
In this section you will find complete step by step instructions for proper front strut replacement and strut installation. If you follow these steps you are assured to make the front shock/strut removal and replacement as easy as possible.
Step by Step Strut replacement procedure:
Step 1. You will need to jack up the car and remove the front wheels to gain access to the front strut assembly. If you are using a Quick Strut, you can skip the spring removal and installation steps. Click on any image for a close up look.Step 2. Remove the Upper Sway Bar link, the Brake line mount and the two Lower Strut Mount Bolts.

Step 3. Remove the three upper strut mount bolts.

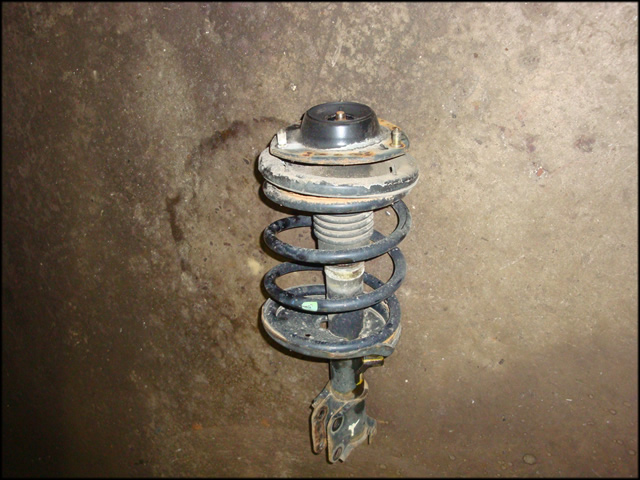
Step 4. Remove the Old Front Strut.
Step 5. The use of a Strut Spring Compressor is needed for the next step. You can use an Inexpensive Strut Spring Compressor> or a more expensive Shop Style Strut Spring Compressor as shown here.

Step 6. Securely mount the strut and compress the spring. Then remove the center Strut Nut and remove the old strut, leaving the spring compressed

Step 7. Remove rubber snubber, spring gasket and dust shield from old strut and install on new strut before installing the old spring.

Step 8. Strut Spring Alignment. Insert New Strut into old compressed strut spring making sure the spring and spring plate are aligned. Now install the center nut and un compress the spring.

Step 9. You now have a complete Strut Assembly that is ready for installation. Install in reverse order of removal.